Pan-Seared Steak Perfection: A Step-by-Step Recipe
The first time I tried pan-searing a steak, I set off my smoke alarm three times and ended up with something that resembled a hockey puck. My apartment smelled like burnt meat for two days, and I genuinely thought pan-searing was some secret skill only chefs possessed.
Turns out? I was doing literally everything wrong. Wrong pan, wrong oil, wrong temperature, wrong everything.
But here’s the good news—once I learned the actual technique, pan-searing became my favorite way to cook steak. No hauling out the grill, no waiting for charcoal to heat up. Just a hot pan, a good steak, and about 10 minutes from start to finish.
Today I’m sharing the exact method that finally worked for me. This is the recipe I use at least twice a month, and it delivers that perfect golden-brown crust with a juicy pink center every single time. And if you’re looking for more ways to cook amazing steaks, check out my full collection of steak recipes for grilling, broiling, and more techniques.
Why Pan-Searing Works So Well
Pan-searing creates what’s called the Maillard reaction—that’s the browning and flavor development that happens when proteins and sugars hit high heat. According to Serious Eats, this reaction is what gives steak that incredible caramelized crust and complex flavor.
The beauty of pan-searing is control. You’re right there, managing the heat, watching the crust develop, and adjusting as needed. Plus, you get all those delicious browned bits (fond) in the pan that you can turn into an incredible pan sauce.
Choosing Your Steak
Best cuts for pan-searing:
- Ribeye (1 to 1.5 inches thick) – my favorite
- New York strip (1 to 1.5 inches)
- Filet mignon (1.5 to 2 inches)
- Sirloin (1 inch) – budget-friendly option
What to look for: Good marbling, even thickness, and at least 1 inch thick. Thinner steaks overcook too easily. I usually grab Choice grade ribeyes—they’re the sweet spot of quality and price.

Pan-Seared Steak Recipe
Prep Time: 35 minutes (includes 30 min resting)
Cook Time: 10 minutes
Total Time: 45 minutes
Servings: 2
Difficulty: Easy
Ingredients
For the Steak:
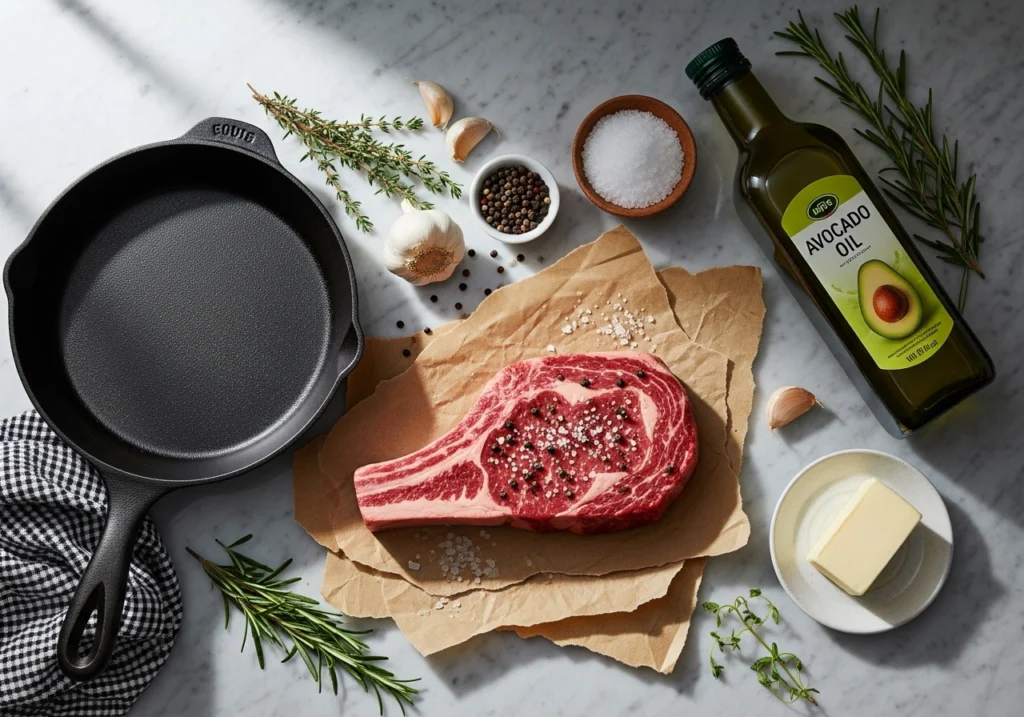
- 2 ribeye or NY strip steaks (1 to 1.5 inches thick, 12-16 oz each)
- 2 teaspoons kosher salt
- 1 teaspoon freshly cracked black pepper
- 2 tablespoons high smoke-point oil (avocado, grapeseed, or refined coconut oil)
For the Butter Baste (Optional but Recommended):
- 3 tablespoons unsalted butter
- 3 garlic cloves, smashed with skin on
- 3-4 sprigs fresh thyme or rosemary
Equipment:
- Cast iron skillet or heavy-bottomed stainless steel pan (12-inch)
- Instant-read meat thermometer
- Tongs
- Paper towels
Instructions
Step 1: Temper Your Steak (30 minutes before cooking)
Remove steaks from the refrigerator and let them sit at room temperature for 30-45 minutes. This is crucial—cold steak hits a hot pan and the outside overcooks before the inside warms up.
While they’re tempering, pat them completely dry with paper towels. I mean really dry. Any moisture will steam instead of sear, and you’ll never get that crust.
Pro tip: I set a timer on my phone for this. It’s easy to forget and end up starting with cold steak.
Step 2: Season Generously (5 minutes before cooking)
Season both sides of each steak with kosher salt and black pepper. I use about 1 teaspoon of salt per steak—don’t be shy. The salt creates flavor and helps develop the crust.
Season right before cooking, not earlier. Salt draws out moisture over time, which is the opposite of what we want.
Step 3: Heat Your Pan Until It’s Smoking Hot (5 minutes)
Place your cast iron skillet on the stove over medium-high to high heat. Let it preheat for a full 5 minutes. This is non-negotiable.
You want the pan hot enough that a drop of water instantly sizzles and evaporates. Mine usually starts showing wisps of smoke around the 4-minute mark—that’s perfect.
Open your windows and turn on your exhaust fan. It’s gonna get smoky, and that’s exactly what we want.

Step 4: Add Oil and Sear First Side (3-4 minutes)
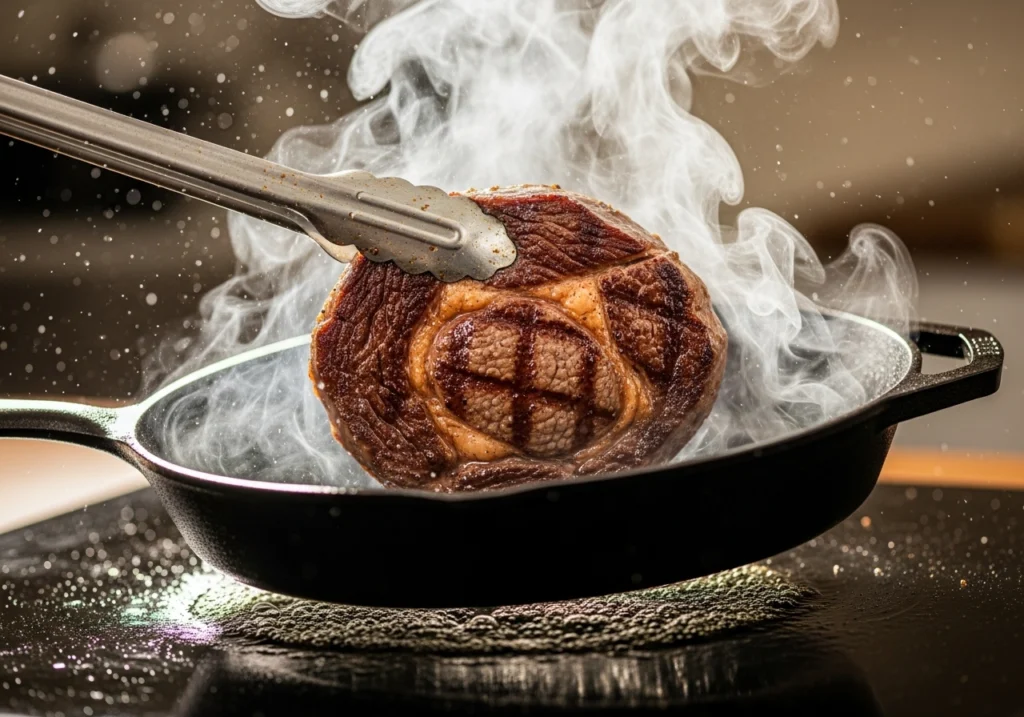
Add your high smoke-point oil to the hot pan. Swirl it around to coat, then immediately lay your steaks in the pan away from you (to avoid splatter). Don’t move them.
You should hear an immediate loud sizzle. If you don’t, your pan wasn’t hot enough.
Let them cook undisturbed for 3-4 minutes. Resist the urge to peek or move them. The steak will release naturally when it’s ready to flip. If it’s sticking, it needs more time.
Step 5: Flip and Sear Second Side (3-4 minutes)
Using tongs, flip the steak. You should see a gorgeous golden-brown crust. If it’s pale or gray, your heat wasn’t high enough—learn for next time, but keep going.
Sear the second side for another 3-4 minutes.
Step 6: Add Butter and Aromatics (1-2 minutes)
Reduce heat to medium. Add butter, smashed garlic cloves, and fresh herbs to the pan. As the butter melts, tilt the pan toward you and use a spoon to continuously baste the steak with the melted butter.
This is where magic happens. The butter adds richness, the garlic and herbs infuse flavor, and the basting helps the top surface cook evenly.
Do this for 1-2 minutes, spooning that butter over the steak constantly.
This step is technically optional, but it takes your steak from good to restaurant-quality. Don’t skip it if you can help it.
Step 7: Check Temperature
Insert your instant-read thermometer horizontally into the side of the steak, aiming for the center.
Target pull temperatures:
- Rare: 120°F
- Medium-rare: 130°F (my recommendation)
- Medium: 140°F
- Medium-well: 145°F
Remember, the steak will continue cooking as it rests (carryover cooking), so pull it 5°F before your desired final temp.
If it’s not there yet, keep cooking and basting, checking every 30 seconds.
Step 8: Rest Your Steak (5-10 minutes)
This is mandatory. Transfer your steak to a cutting board or plate and tent it loosely with aluminum foil.
For a 1-inch steak, rest for 5 minutes minimum. Thicker steaks need 10 minutes. The internal juices redistribute during this time, and you’ll end up with a much juicier steak.
I know it’s tempting to cut in right away. Don’t do it. I’ve learned this lesson the hard way too many times—cutting too early means juice all over your plate and drier meat.
Step 9: Slice and Serve
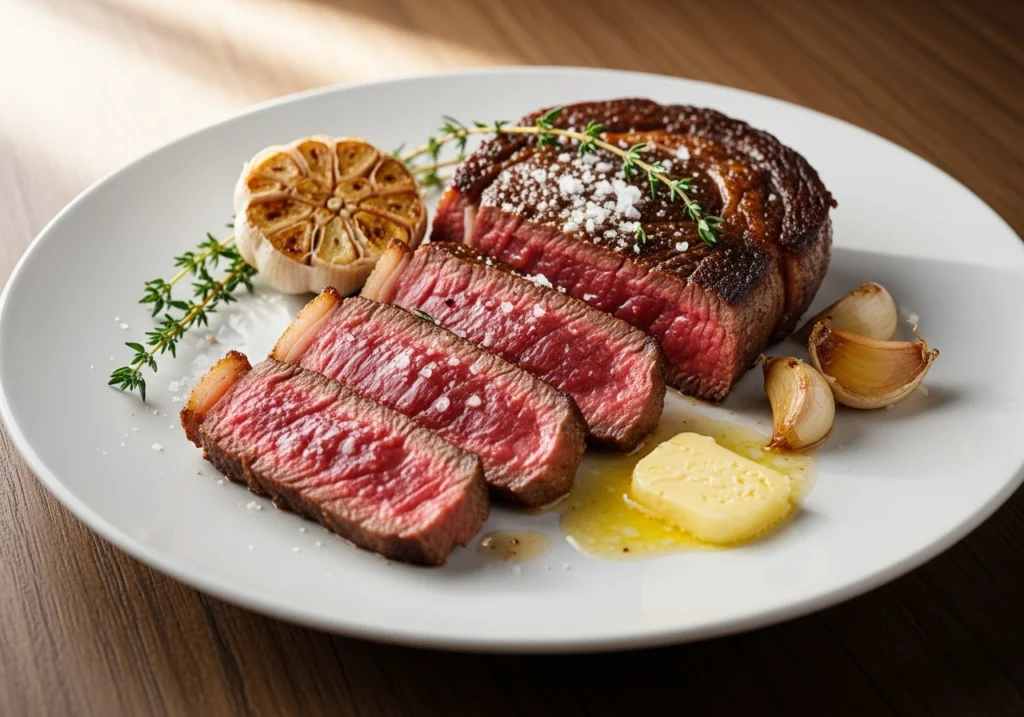
If you’re slicing your steak (not mandatory for ribeye or strip), cut against the grain. This shortens the muscle fibers and makes each bite more tender.
Drizzle any resting juices from the cutting board over the top.

Notes
Oil Selection: Use oils with high smoke points (400°F+). Avocado oil, grapeseed, or refined coconut work best. Don’t use olive oil or butter for the initial sear—they’ll burn.
Pan Choice: Cast iron is ideal because it retains heat incredibly well. Heavy stainless steel works too. Avoid nonstick pans—they can’t handle the high heat needed.
Storage: Store leftover steak in an airtight container in the fridge for up to 3 days. Reheat gently in a low oven (250°F) until just warmed through.
Substitutions: Can’t find ribeye? NY strip works identically. Sirloin works too but watch it carefully—it’s leaner and overcooks faster.
Pro Tips for Perfect Pan-Seared Steak
Tip #1: If your steak is thicker than 1.5 inches, finish it in a 400°F oven after searing both sides. This prevents burning the outside while waiting for the inside to cook.
Tip #2: One steak per pan. Crowding the pan drops the temperature and you’ll steam instead of sear. If cooking multiple steaks, use two pans or cook in batches.
Tip #3: Let your pan reheat for 1-2 minutes between steaks. It loses heat after the first one.
Tip #4: Save those browned bits in the pan! After removing your steak, add a splash of wine or beef broth, scrape up the fond, and you’ve got an instant pan sauce.
Tip #5: If you don’t have an instant-read thermometer, get one. They’re $20-30 and eliminate all guesswork. Worth every penny.
Common Mistakes to Avoid
Starting with a cold steak: Seriously, let it sit out. Room temp steaks cook way more evenly.
Not drying the surface: Pat it dry, then pat it again. Moisture is the enemy of a good crust.
Moving the steak around: Put it down and leave it alone. Every time you move it, you interrupt crust formation.
Skipping the rest: I can’t stress this enough. Resting is not optional.
Using low heat: You need HIGH heat for pan-searing. If your kitchen isn’t getting a bit smoky, your heat is too low.
FAQ
Can I use a nonstick pan?
Not really. Nonstick pans can’t handle the high heat needed for proper searing. You’ll damage the coating and won’t get a good crust.
My smoke alarm keeps going off. What am I doing wrong?
Nothing! Pan-searing steak creates smoke—that’s normal. Open windows, turn on fans, and maybe disable your alarm temporarily (just don’t forget to turn it back on).
How do I know when to flip without cutting into it?
The steak will release naturally from the pan when it’s ready. If it’s sticking, give it another 30 seconds. Also, you can peek at the side—when you see the crust color creeping halfway up, it’s time.
Can I cook a frozen steak?
I don’t recommend it. You’ll get a steamed, gray exterior before the inside thaws enough to cook. Always thaw first.
Final Thoughts
Pan-searing changed my relationship with cooking steak at home. There’s something incredibly satisfying about hearing that sizzle, smelling that butter and garlic, and knowing you’re about to eat something as good as any steakhouse.
The technique takes a bit of practice to nail perfectly, but even your first attempt will probably be pretty delicious. By your third or fourth try, you’ll have it down cold.
So grab a good steak, heat up that cast iron, and give it a shot. Your kitchen might get smoky, but trust me—it’s so worth it.
Happy cooking!
– Ellie
Quick Reference
Timing Guide for 1-inch Steak:
- Rare (125°F): 6-7 minutes total
- Medium-rare (135°F): 7-8 minutes total
- Medium (145°F): 8-9 minutes total
Remember: Pull 5°F early, always rest 5-10 minutes!
