Steak Recipes
Your Complete Guide to Cooking Perfect Steak Every Time
You know that moment when you cut into a steak at a restaurant and it’s just… perfect? The crust is dark and crispy, the inside is exactly the shade of pink you were hoping for, and every bite practically melts in your mouth. Here’s what I’ve learned after years of trial and error (and yes, some pretty expensive mistakes): you can absolutely recreate that magic at home. You just need to understand a few key principles and trust the process.
I’ll never forget the first time I tried cooking a nice steak for a dinner date. I nervously hovered over it, flipping it every thirty seconds because I was terrified of overcooking it. The result? A gray, tough piece of meat that cost me thirty bucks and nearly cost me a second date. That disaster sent me down a rabbit hole of learning everything I could about steak preparation, and honestly, it changed my entire relationship with cooking.
This guide walks you through everything you need to know about cooking different steak cuts using various methods. Whether you’re grilling outside on a summer evening or pan-searing in your kitchen during winter, I’ve got you covered. We’ll talk about choosing the right cut, getting your temperatures right, and most importantly, understanding when to leave your steak alone (hardest lesson I ever learned).
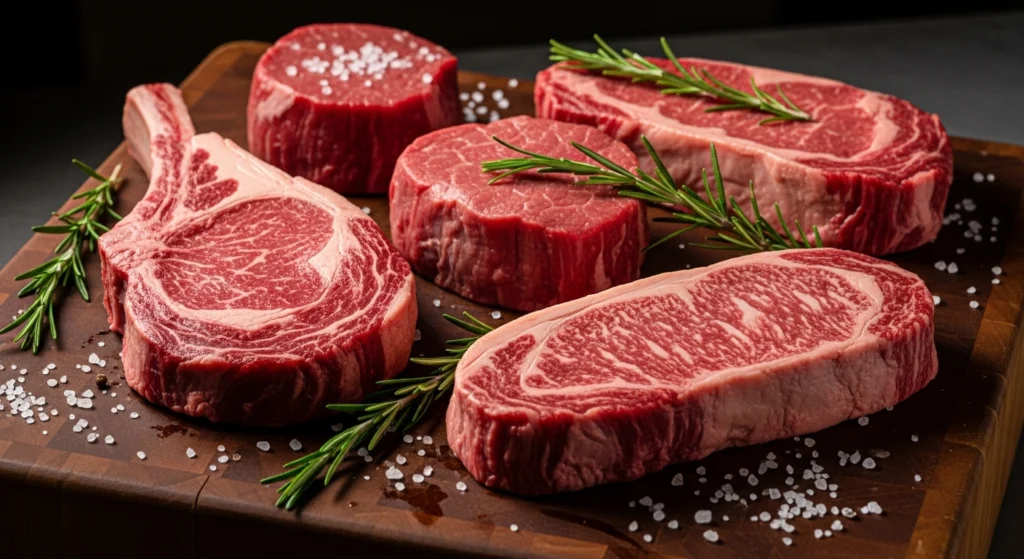
Understanding Different Steak Cuts
Let’s start with the basics. Not all steaks are created equal, and knowing which cut you’re working with makes all the difference in how you should cook it.
Ribeye is my personal favorite for flavor. It’s got that beautiful marbling running through it – those white streaks of fat that basically melt into the meat as it cooks. This fat is what gives ribeye its rich, buttery flavor. It’s forgiving too, which makes it perfect if you’re still building your confidence. The extra fat content means it stays juicy even if you accidentally overcook it a bit (we’ve all been there).
New York Strip sits right in the middle of the pack. It’s got decent marbling but not as much as ribeye, which means it’s a bit leaner and has a firmer texture. According to the USDA’s guide to beef cuts, the strip comes from the short loin and offers a great balance of tenderness and beefy flavor. I love this cut when I want something substantial but not quite as rich as ribeye.
Filet Mignon is the tender one. It comes from the tenderloin, a muscle that doesn’t do much work, so it’s incredibly soft. But here’s the thing nobody tells you: it’s not the most flavorful cut on its own. That’s why you’ll often see it wrapped in bacon or served with rich sauces. It’s like the blank canvas of the steak world – tender as can be, but it needs a little help in the flavor department.
Sirloin is your budget-friendly workhorse. It’s leaner, a bit tougher than the premium cuts, but it’s got great beef flavor. I actually reach for sirloin pretty often because it handles bold seasonings beautifully and it won’t break the bank. You just need to be more careful about not overcooking it since there’s less fat to keep it moist.
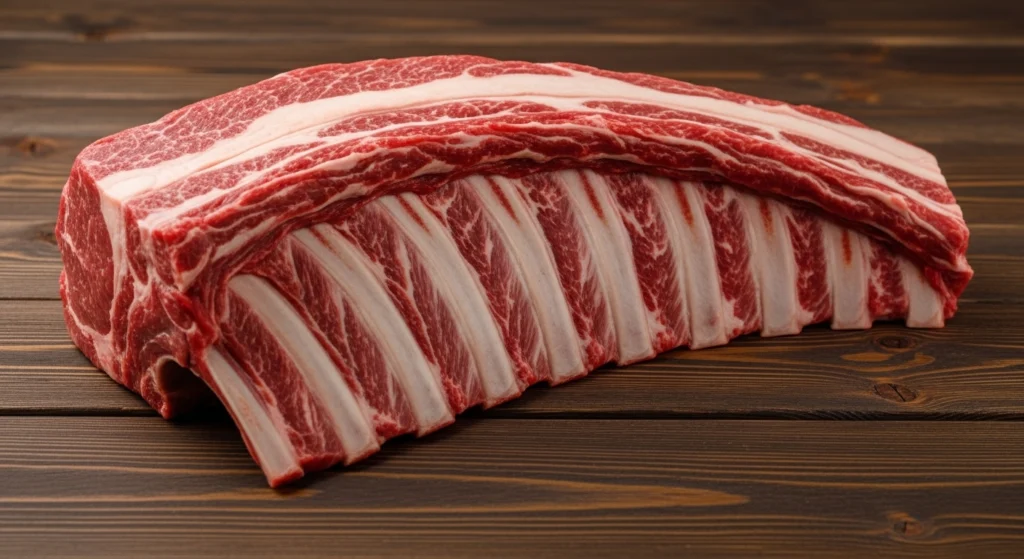
T-Bone and Porterhouse are basically two steaks in one – you get a strip on one side of the bone and a piece of tenderloin on the other. The difference between them? A porterhouse has a bigger tenderloin section. These are show-stoppers, perfect for when you want to impress someone or just feel like treating yourself.
The Foundation: Preparing Your Steak
This is where most home cooks go wrong, and I say that with love because I made every mistake in the book. You can’t just slap a cold steak on a hot pan and expect magic to happen.
Temperature matters more than you think. Take your steak out of the fridge at least 30-45 minutes before cooking. I know it feels weird leaving raw meat on the counter, but a room-temperature steak cooks way more evenly. When you throw a cold steak on heat, the outside overcooks before the inside even has a chance to warm up. I like to set a timer on my phone because otherwise I forget (usually while I’m prepping everything else).
Pat it dry. This one seems silly until you understand the science. Any moisture on the surface of your steak will steam instead of sear, and you want that gorgeous brown crust. I use paper towels and really press down to get it as dry as possible. Sometimes I’ll even leave it uncovered in the fridge for a few hours before cooking – this is called dry-brining, and it gives you an even better crust.
Season generously. I mean REALLY generously. Most people under-season their steaks because they’re nervous about using too much salt. But here’s the thing – a lot of that seasoning doesn’t actually penetrate the meat. You want to see a visible crust of salt and pepper. I use coarse kosher salt and freshly cracked black pepper, and I’m not shy about it. If you’re feeling adventurous, you can season it several hours ahead (or even overnight) and let it sit uncovered in the fridge. The salt will draw out moisture, then that moisture will reabsorb carrying the salt flavor deep into the meat.
Grilling: The Classic Method
There’s something primal about cooking steak over an open flame. The smell, the sizzle, that char you get – it’s hard to beat. But grilling isn’t just about throwing meat on hot grates and hoping for the best.
Get your grill screaming hot. I’m talking 450-500°F for a good sear. If you’re using charcoal, let those coals burn until they’re covered with white ash. For gas grills, crank all the burners to high and give it a solid 10-15 minutes to preheat. You want to hear that sizzle the instant the steak hits the grates – that’s the sound of success right there.
The two-zone setup changed my grilling game completely. On a charcoal grill, pile all your coals on one side. On a gas grill, leave one burner on low or turn it off completely. This gives you a hot zone for searing and a cooler zone for finishing thicker steaks without burning the outside. I sear for about 2-3 minutes per side over high heat, then move the steak to the cooler side to finish cooking to my preferred doneness.
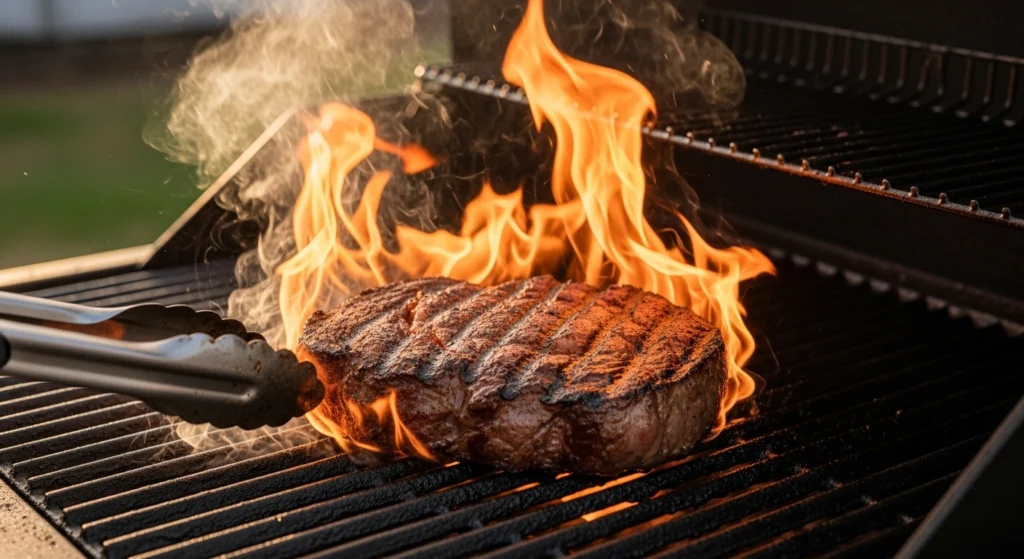
Here’s a trick I learned from my neighbor who used to be a grill cook: only flip once. I know it’s tempting to keep checking, but every time you flip that steak, you lose heat and interrupt the searing process. Trust the timing. For a 1-inch thick steak, I do about 3-4 minutes per side for medium-rare. Thicker cuts might need 5-6 minutes per side.
Don’t forget to clean and oil your grates before cooking. Nothing’s worse than your beautiful steak sticking to the grill because you skipped this step. I use tongs to rub a paper towel soaked in vegetable oil across the hot grates right before the steak goes on.
If you want to level up, try the reverse sear on the grill. Start your steak on the cool side with the lid closed, letting it slowly come up to temperature (this works great for thick cuts, 1.5 inches or more). Once it hits about 110-115°F internally, move it to the hot side for a quick sear on each side. The result? Wall-to-wall perfect doneness with an incredible crust. For more outdoor cooking techniques, check out our complete grilling guide.
Pan-Searing: When Grilling Isn’t an Option
Let me tell you, some of the best steaks I’ve ever made were cooked entirely indoors in a cast iron skillet. When it’s pouring rain or the middle of winter, pan-searing is your best friend.
Cast iron is king here. It holds heat better than anything else in your kitchen. If you don’t have cast iron, a heavy stainless steel pan works too – just avoid nonstick because it can’t handle the high heat you need. I preheat my pan over medium-high heat for at least 5 minutes. You want it so hot that a drop of water instantly evaporates and sizzles.
Add a high-smoke-point oil to your pan – I use avocado oil or refined vegetable oil. Stay away from olive oil or butter at this stage because they’ll burn. You only need enough to lightly coat the bottom of the pan. When the oil starts to shimmer and smoke just slightly, your steak goes in.
The butter basting technique is where you separate the amateurs from the pros. After searing both sides of your steak (3-4 minutes per side for a 1-inch cut), I reduce the heat to medium and add a couple tablespoons of butter, some smashed garlic cloves, and fresh thyme or rosemary. As the butter melts and gets foamy, I tilt the pan and use a spoon to continuously pour that butter over the top of the steak. This bastes it in incredible flavor and helps the top surface cook evenly.
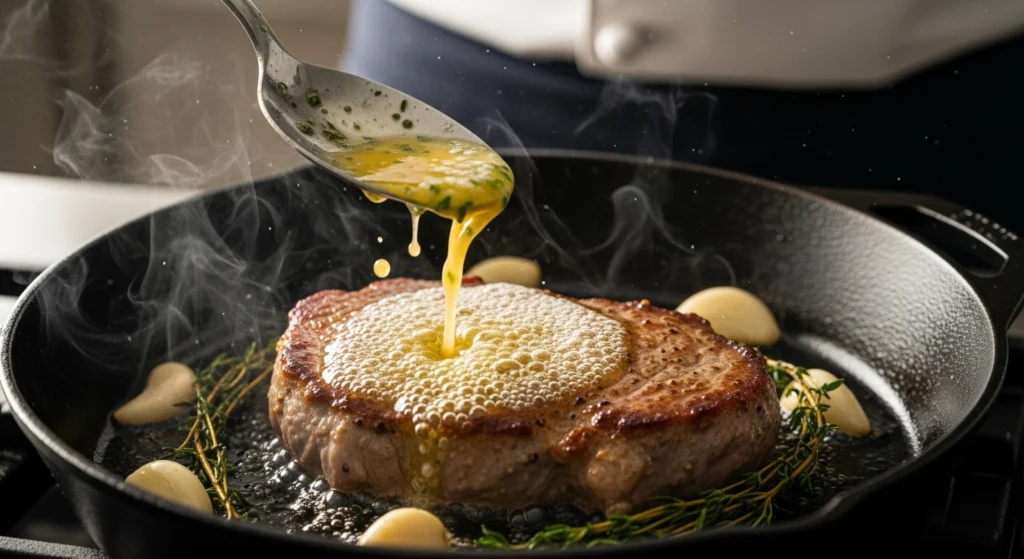
Your kitchen will get smoky – that’s normal and actually a good sign. I always turn on my exhaust fan and sometimes crack a window. The smell is amazing though, so I’m not complaining. According to Serious Eats’ comprehensive steak guide, this combination of high-heat searing and butter basting creates both the Maillard reaction (that delicious brown crust) and adds an extra layer of richness.
For thicker steaks (over 1.5 inches), I finish them in a 400°F oven after searing. Just pop the whole pan in for 5-8 minutes depending on your desired doneness. This ensures the center cooks through without burning the exterior.
Oven Techniques: Slow and Steady
The oven method doesn’t get enough credit. It’s less dramatic than grilling or pan-searing, but man, does it deliver consistent results.
The reverse sear in the oven works beautifully for thick, expensive cuts where precision matters. Place your seasoned steak on a wire rack set over a baking sheet. This allows air to circulate all around it. Start in a low oven – around 250°F. Use a meat thermometer (seriously, get one if you don’t have one already) and cook until the internal temp hits about 115°F for rare, 120°F for medium-rare. This usually takes 20-30 minutes for a thick steak.
Once it hits your target temp, heat up a cast iron skillet until it’s screaming hot. Sear that steak for 60-90 seconds per side to develop a crust. The result is restaurant-quality edge-to-edge doneness with a perfect crust. I use this method for special occasions when I’ve splurged on a really nice cut.
Broiling is basically indoor grilling. Your broiler gets incredibly hot and cooks from above, similar to how grilled steaks cook from below. Position your oven rack about 4-6 inches from the broiler element. Preheat the broiler for at least 10 minutes (most people skip this step). Place your steak on a broiler pan or a regular pan – it should be close enough to get intense heat but not so close it burns immediately. I cook about 4-5 minutes per side for medium-rare, keeping the oven door slightly cracked to prevent the broiler from cycling off.
Getting the Temperature Right
This is probably the most important section in this entire guide. You can have the best quality steak, perfect seasoning, and great technique, but if you pull it off the heat at the wrong time, all that effort goes out the window.
Invest in a good instant-read thermometer. I can’t stress this enough. Those little digital thermometers that give you a reading in 2-3 seconds cost like twenty bucks and will completely change your steak game. Guessing by touch or cutting into your steak to check releases all those precious juices. You need to know what’s happening inside without destroying your steak in the process.
Here are the target internal temperatures (remember, the steak will continue cooking another 5 degrees after you remove it – this is called carryover cooking):
- Rare: Pull at 120°F, final temp 125°F (cool red center)
- Medium-Rare: Pull at 125-130°F, final temp 130-135°F (warm red center)
- Medium: Pull at 135-140°F, final temp 140-145°F (warm pink center)
- Medium-Well: Pull at 145-150°F, final temp 150-155°F (slightly pink center)
- Well-Done: Pull at 155°F+, final temp 160°F+ (no pink)
I’m firmly in the medium-rare camp for most cuts. That’s where you get tenderness, juiciness, and flavor all working together. But everyone has preferences, and you should cook your steak however you like it best. There’s no steak police (though some people act like it).
The Rest Period (Don’t Skip This!)
Okay, your steak is cooked perfectly. You’re hungry. Every instinct is telling you to cut into it immediately. DON’T DO IT. This is where patience pays off big time.
When steak cooks, all the juices get pushed toward the center as the muscle fibers contract. If you cut into it right away, all those juices run out onto your cutting board instead of staying in the meat where they belong. Let your steak rest for at least 5-10 minutes (thicker cuts can go longer). Tent it loosely with foil if you want to keep it warm, but don’t wrap it tight or you’ll steam the crust you worked so hard to create.
During this rest period, those juices redistribute throughout the meat. The muscle fibers relax. The internal temperature evens out. When you finally cut into it, you get a juicy steak instead of a puddle on your plate. I usually use this time to finish my side dishes or make a quick pan sauce with the drippings. Speaking of sides, our best steakhouse side dishes pairs perfectly with any steak recipe.
Seven Expert Tips That Actually Matter
After cooking hundreds of steaks, these are the tricks that consistently level up my results:
Salt early or salt right before – nothing in between. If you season 40 minutes ahead, the salt draws out moisture without time to reabsorb. Either season right before cooking, or go all in and season several hours ahead (or overnight) for deep flavor penetration and a better crust.
Room temperature isn’t optional. I mentioned this earlier but it bears repeating. A cold steak from the fridge will have a cold center by the time the outside is cooked. Taking 30 minutes to bring it to room temperature makes an enormous difference in even cooking.
Don’t move it around. When that steak hits the hot surface, leave it alone. Every time you move it, you break contact and interrupt the searing process. Trust the timing and resist the urge to fiddle with it. This was honestly the hardest habit for me to break.
Higher quality means simpler seasoning. If you’ve splurged on a prime grade ribeye with beautiful marbling, all you need is salt and pepper. Let that natural beef flavor shine. Save the fancy rubs and marinades for more affordable cuts that benefit from extra flavor boosters.
Compound butter is your secret weapon. Mix softened butter with herbs, garlic, or blue cheese, then place a pat on your resting steak. As it melts, it creates an instant sauce and adds incredible richness. I keep a log of compound butter in my freezer and just slice off what I need.
The finger test isn’t reliable. You know that thing where you touch different parts of your hand to judge doneness? Yeah, it’s inconsistent at best. Everyone’s hands are different, and every cut of steak behaves differently. Just get a thermometer and remove the guesswork.
Quality matters, but technique matters more. I’ve cooked choice grade steaks that blew away poorly cooked prime cuts. A great technique with a good steak beats mediocre technique with an expensive steak every time. Focus on mastering the fundamentals before worrying too much about getting dry-aged wagyu.
Common Mistakes (And How to Fix Them)
We’ve all messed up a steak before. Here’s how to avoid the most common pitfalls I see people make (and that I definitely haven’t made myself… multiple times… recently…).
Mistake #1: Cooking from cold. I already mentioned this, but it’s such a common error that it’s worth emphasizing again. A fridge-cold steak shocks the pan, drops the temperature, and results in uneven cooking. The outside overcooks before the inside even warms up. Solution? Patience. Set it on the counter while you prep everything else. Your future self will thank you.
Mistake #2: Using low heat. Some people think they need to cook steak slowly over medium or medium-low heat to “avoid drying it out.” But you need intense heat to trigger the Maillard reaction – that’s the chemical process that creates the brown, flavorful crust. Without high heat, you’re basically steaming your steak. Solution? Get comfortable with high heat. Your steak needs that initial blast to sear properly.
Mistake #3: Flipping constantly. I used to do this when I was nervous about burning my steak. But every flip releases heat and prevents proper crust formation. Solution? One flip (maybe two if you’re doing fancy crosshatch grill marks, but that’s just for looks). Set a timer and trust the process.
Mistake #4: Cutting into it to check doneness. Every time you cut into cooking meat, you create an exit route for all those delicious juices. Solution? Get a $20 thermometer. I promise it’s the best investment you’ll make in your cooking journey.
Mistake #5: Skipping the rest. I get it – you’re hungry and it smells amazing. But cutting into a steak immediately after cooking is like opening your oven door halfway through baking a cake. You sabotage all your hard work. Solution? Practice patience. Pour yourself a glass of wine, take a breath, and give it 5-10 minutes. The difference is night and day.
[IMAGE 6: “Side-by-side comparison photo of two sliced steaks on cutting boards, one labeled ‘rested’ showing juice retention and one labeled ‘not rested’ with juice pooled on board, educational cooking demonstration, clean overhead shot, bright kitchen lighting”]
Finishing Touches and Serving
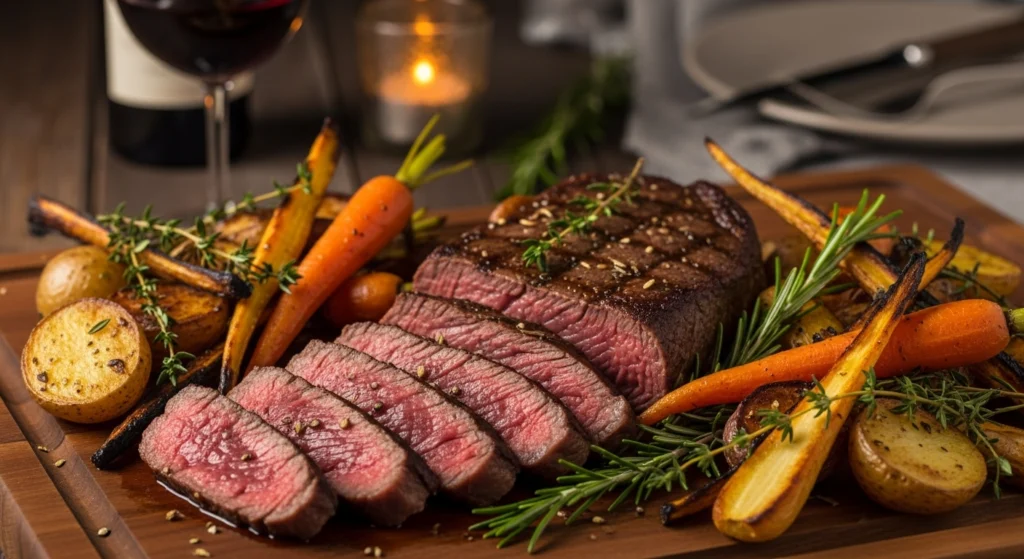
The steak is cooked, it’s rested, and now it’s time for the finale. How you finish and serve your steak can take it from good to memorable.
Slice against the grain. If you look closely at your steak, you’ll see lines running through the meat – that’s the grain (the direction of the muscle fibers). Cutting perpendicular to these lines shortens the fibers, making each bite more tender. This is especially important for tougher cuts like flank or skirt steak, but it applies to all cuts. For a strip or ribeye, the grain usually runs lengthwise, so you’d cut across the narrow width.
Flaky sea salt at the end adds an amazing textural contrast and a burst of salinity. I keep Maldon sea salt or fleur de sel just for this purpose. A light sprinkle right before serving gives you these little crunchy pockets of salt that elevate the whole experience.
Fresh herbs aren’t just for looks. A few leaves of fresh thyme, rosemary, or even parsley scattered over the top add a pop of color and a subtle freshness that balances the richness of the meat. I’ll sometimes place a whole sprig of rosemary on the steak while it rests so the aromatics infuse a bit.
Sauces are optional but fun. A perfectly cooked steak doesn’t NEED sauce, but that doesn’t mean you can’t enjoy one. Classic options include peppercorn sauce, béarnaise, chimichurri, or a simple pan sauce made from the drippings. I like to serve sauce on the side so everyone can control how much they want. The Beef Checkoff’s guide to sauces has great traditional recipes if you want to explore this further.
Bringing It All Together
Learning to cook steak well is one of those skills that feels intimidating at first but becomes second nature with practice. You’ll mess up a few times – we all do. That first ribeye I turned into shoe leather taught me more than any perfect steak ever could.
The beautiful thing about steak is that it’s actually pretty forgiving once you understand the core principles. High heat for searing. Proper seasoning. Accurate temperature monitoring. Adequate resting time. Master those four things and you’re 90% of the way there. The rest is just details and personal preference.
Start with a less expensive cut like sirloin to practice your technique. Once you’re consistently nailing the basics, move up to the pricier cuts. Try different cooking methods to see which ones work best for your kitchen setup and lifestyle. Some people swear by their grill, others are cast iron devotees, and plenty of folks get amazing results with the oven reverse sear.
The next time you’re at a restaurant and bite into a perfect steak, you’ll realize you can do that at home. Maybe it’ll take a few tries to dial in your timing, or to learn the quirks of your particular stove or grill. But that moment when you cut into a steak you cooked yourself and it’s exactly the way you wanted it? That’s when cooking goes from being a chore to being genuinely satisfying.
So grab a good steak, season it generously, get your cooking surface hot, and trust the process. Your perfect steak dinner is waiting, and it’s probably going to be better (and definitely cheaper) than going out. Now if you’ll excuse me, all this steak talk has made me hungry – I think I have a ribeye calling my name from the fridge.