The Ultimate Guide to Chicken Tenderloin Recipes: 15 Easy Ways to Transform This Versatile Cut
Introduction
So there I was, staring at a package of chicken tenderloins at 5:47 PM on a Wednesday, with three hungry kids asking “what’s for dinner?” for the fifteenth time. Sound familiar? That moment of mild panic when you realize you grabbed the wrong package at the store – tenderloins instead of breasts – actually turned into one of my best kitchen discoveries.
Here’s the thing about chicken tenderloins that nobody tells you: they’re actually the MVP of weeknight dinners. These little strips of magic cook in half the time of regular chicken breasts, stay ridiculously juicy (even when you accidentally forget about them for an extra minute or two), and kids actually eat them without the usual dinner table negotiations.
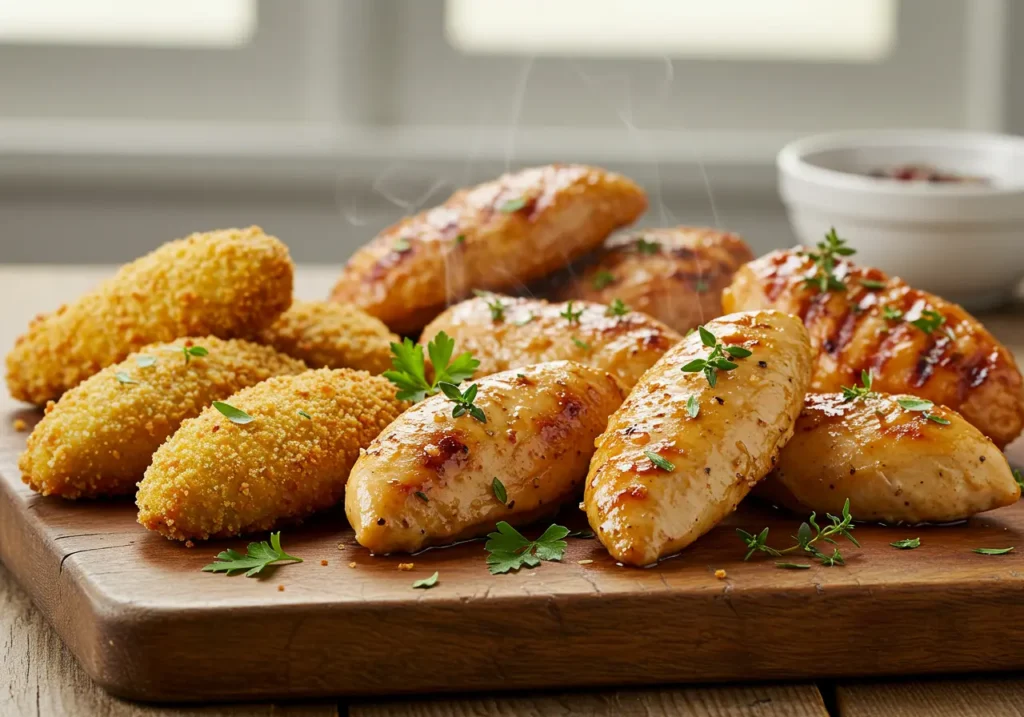
If you’re looking for chicken tenderloin recipes that go beyond basic chicken strips, you’ve hit the jackpot. We’re talking everything from restaurant-style honey garlic tenderloins that’ll have your family thinking you’ve been secretly attending culinary school, to a one-pan Mediterranean version that makes cleanup so easy you’ll actually volunteer to cook dinner tomorrow night too. And yes, I’ll share my fool-proof trick for getting that perfect golden crust without deep frying – the one that made my mother-in-law ask for the recipe.
Why Chicken Tenderloins Are Actually Better Than Breasts (Fight Me)
I’ll admit it – I used to be a chicken breast snob. But after years of cooking both cuts, tenderloins have completely won me over, and here’s why you should give them a chance too.
First off, let’s talk about what we’re actually dealing with here. Chicken tenderloins are those small strips of meat that hang out underneath the breast. They’re naturally more tender (hence the name) because this muscle does less work than the breast itself. Think of them as nature’s pre-portioned chicken strips – no cutting required, which means one less cutting board to wash.
The real game-changer? Cook time. While a thick chicken breast can take 25-30 minutes to bake through, tenderloins are done in about 15 minutes. That’s literally half the time. And because they’re thinner and more uniform in size, they cook evenly without those dreaded dry edges and raw centers that plague hastily cooked chicken breasts.
But here’s my favorite part – the built-in portion control. Each tenderloin is roughly 2 ounces, making it super easy to figure out servings. Two to three per adult, one to two for kids, done. No more standing there with a knife trying to slice chicken breasts evenly while everyone’s already seated at the table.
The texture difference is something you’ll notice immediately. According to the folks at Serious Eats, the tenderloin’s muscle fibers are shorter and more delicate, which means they literally can’t get as tough as breast meat, even if you overcook them slightly. It’s like kitchen insurance for those nights when you’re juggling homework help with dinner prep.
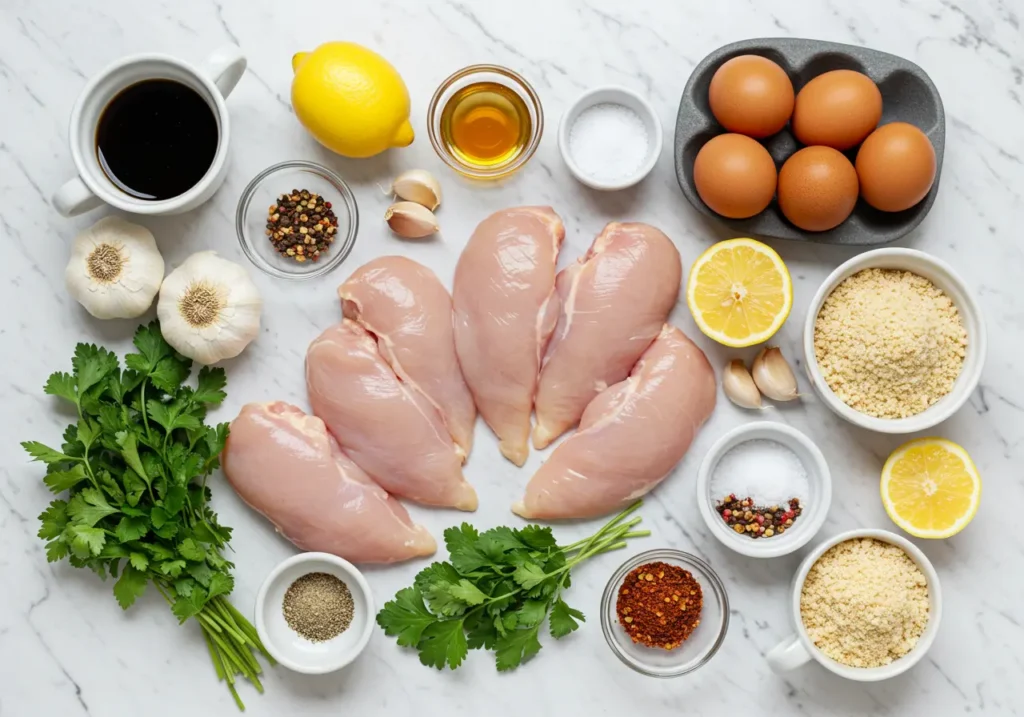
Your Complete Chicken Tenderloin Shopping and Prep Guide
What to Look for at the Store
Not all tenderloins are created equal, and I learned this the hard way after bringing home a package that was mostly tendon. When you’re shopping, look for tenderloins that are pale pink (not gray or yellow-tinged) with minimal white streaking. They should smell like, well, nothing really. If there’s any sour or off smell, skip that package.
Fresh vs. frozen? Both work great, honestly. I keep a bag of individually frozen tenderloins from Costco in my freezer at all times – they’re my dinner emergency kit. If you go frozen, just make sure they’re IQF (individually quick frozen) so you can grab exactly what you need without defrosting the whole bag.
Size matters here. Look for tenderloins that are relatively uniform in size – usually about 2-3 inches long and about an inch wide at the thickest part. Some stores sell “tenderloin pieces” which are just chopped up bits. Skip those for these recipes; we want the whole strips.
The Great Tendon Debate
Okay, we need to talk about that white stringy bit – the tendon. Some people religiously remove it, others leave it on. After cooking approximately 8,000 tenderloins (slight exaggeration), here’s my take: for breaded or fried tenderloins, remove it. For grilled or baked? Leave it on. It actually helps hold the meat together during cooking, and once it’s cooked, you barely notice it.
If you do want to remove it, here’s the easiest way: grab the visible white end with a paper towel (for grip), hold your knife at an angle against the tendon, and pull while gently scraping. It’ll slide right out. Takes about 5 seconds per tenderloin once you get the hang of it.
Pre-Cooking Prep That Actually Makes a Difference
Pat them dry. I know everyone says this about all meat, but with tenderloins, it’s crucial. These little guys have a lot of surface area relative to their size, and moisture is the enemy of browning. I lay them out on paper towels, pat the tops, then let them sit for 5 minutes while I prep other ingredients.
Room temperature is your friend. Just 15 minutes on the counter makes a huge difference in even cooking. Set them out when you start gathering ingredients, and by the time you’re ready to cook, they’re perfect.
15 Tested Chicken Tenderloin Recipes That Actually Work
1. Classic Crispy Fried Chicken Tenderloins
Let’s start with the crowd-pleaser. And no, we’re not deep frying because who has time for that mess on a Tuesday?
My secret weapon here is the three-station breading setup, but with a twist I learned from my Southern grandmother: add 2 tablespoons of the seasoned flour to your egg mixture. It creates these little clumps that turn into extra crispy bits. Game changer.
You’ll need:
- 2 lbs chicken tenderloins
- 1 cup all-purpose flour
- 2 eggs + 2 tablespoons flour (the secret!)
- 2 cups panko breadcrumbs
- 1 teaspoon each: garlic powder, paprika, salt
- 1/2 teaspoon black pepper
- Vegetable oil for pan frying
Season your flour with half the spices. Beat eggs with the 2 tablespoons of flour and remaining spices. Set up your stations: flour, egg mixture, panko.
Here’s where most people mess up – they use too much oil. You only need about 1/4 inch in your pan. Heat it to 350°F (drop a breadcrumb in; it should sizzle immediately but not burn). Fry for 3-4 minutes per side. The internal temp should hit 165°F, but honestly, when they’re golden brown all over, they’re done.
2. Honey Garlic Butter Tenderloins (The Wednesday Night Savior)
This recipe has saved more weeknight dinners than I can count. It’s one of those dishes where the sauce does all the heavy lifting, and people think you’re some kind of kitchen wizard.
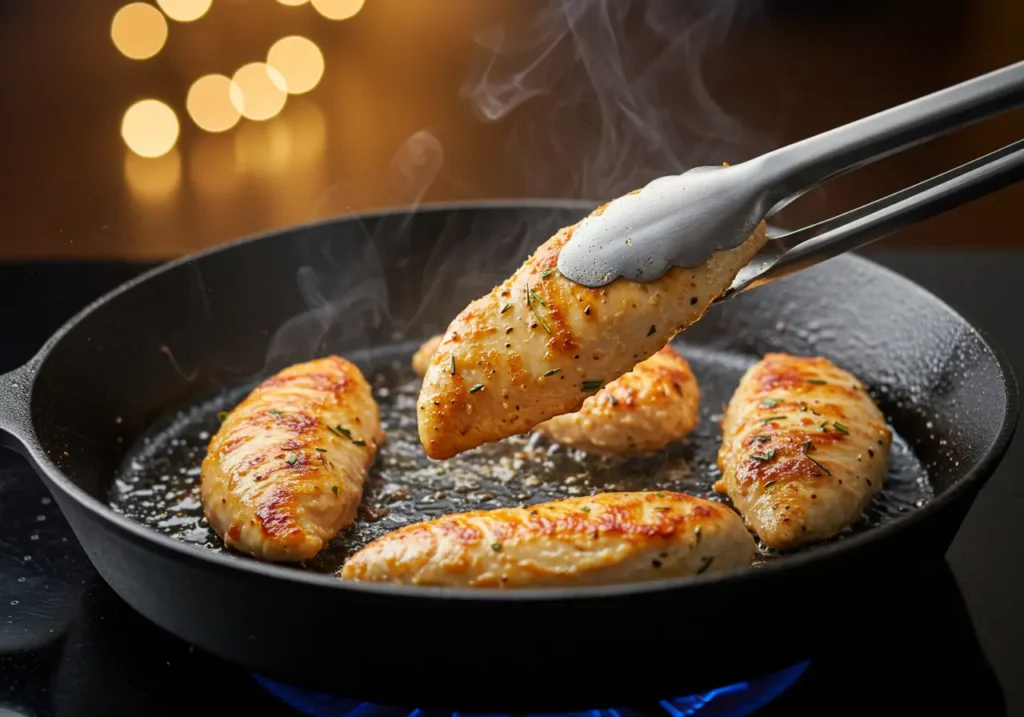
Start by seasoning your tenderloins with just salt, pepper, and a tiny bit of garlic powder. Sear them in a hot skillet with butter – and I mean hot. You want that sizzle. About 3 minutes per side until they’re golden.
Remove the chicken (it won’t be fully cooked yet, that’s fine). In the same pan, add 3 tablespoons butter, 4 minced garlic cloves, 1/3 cup honey, and 2 tablespoons soy sauce. Let it bubble for about 30 seconds, then add the chicken back. Flip them around in that glorious sauce for another 2-3 minutes until they’re coated and cooked through.
The sauce will thicken as it cools, so don’t worry if it seems thin at first. Serve over rice to soak up every drop, and watch your kids actually lick their plates clean.
3. Mediterranean Baked Tenderloins (The Fancy-Looking Easy One)
This is my go-to when I need something that looks impressive but requires minimal effort. One pan, 20 minutes, done.
Toss your tenderloins with olive oil, lemon juice, oregano, and garlic. Arrange them in a baking dish with cherry tomatoes, kalamata olives, chunks of red onion, and cubes of feta. Drizzle everything with more olive oil, season with salt and pepper, and bake at 400°F for 18-20 minutes.
The tomatoes burst, the feta gets creamy, and the chicken absorbs all those Mediterranean flavors. Serve with crusty bread or over orzo, and suddenly your Wednesday night dinner looks like something from that fancy Greek place downtown.
4. Buffalo Chicken Tenderloins (Without the Deep Fryer)
My husband requests these at least twice a month, and I don’t mind because they’re stupidly easy. The trick is baking them super hot – 425°F – on a wire rack set over a baking sheet. This lets air circulate around them, getting them crispy without frying.
Season with salt and pepper, brush with melted butter mixed with hot sauce (I use Frank’s RedHot), and bake for 15 minutes. Flip, brush with more buffalo butter, and bake another 5-7 minutes. They come out crispy, spicy, and perfect with ranch or blue cheese.
Pro tip: Line your baking sheet with foil for easy cleanup. Buffalo sauce is delicious but not fun to scrub off pans.
5. Teriyaki Glazed Tenderloins (Better Than Takeout)
I stopped ordering teriyaki chicken when I realized how easy it is to make at home. And honestly? Mine’s better because I control the sugar content.
Make your teriyaki sauce first: 1/4 cup soy sauce, 2 tablespoons honey, 1 tablespoon rice vinegar, 1 teaspoon sesame oil, 2 cloves minced garlic, and 1 teaspoon cornstarch mixed with 2 tablespoons water.
Pan-sear your tenderloins until golden, about 3 minutes per side. Remove them, add your sauce to the pan, let it bubble and thicken (about 1 minute), then return the chicken. Toss to coat, sprinkle with sesame seeds and sliced green onions.
The whole thing takes 15 minutes, costs about $8 to feed four people, and nobody complains about vegetables when I serve it over stir-fried broccoli and rice.
6. Parmesan Crusted Tenderloins (The Kid Favorite)
My kids would eat these every single night if I let them. The parmesan crust gets golden and crispy, and they taste like fancy chicken fingers.
Mix 1 cup grated parmesan (the real stuff, not the green can – though in a pinch, that works too), 1 cup panko breadcrumbs, 1 teaspoon Italian seasoning, and 1/2 teaspoon garlic powder. Dip your tenderloins in beaten egg, then press into the parmesan mixture.
Here’s the key: arrange them on a baking sheet and spray the tops with cooking spray. Bake at 400°F for 15-18 minutes, flipping once. The spray helps the coating get golden without adding tons of oil.
Serve with marinara sauce for dipping, and watch them disappear.
7. Coconut Curry Tenderloins (The Surprise Hit)
I was skeptical about this combination until I tried it. Now it’s in our regular rotation. The coconut milk keeps the chicken incredibly moist, and the curry flavors are mild enough that even my spice-averse kid will eat it.
Sauté diced onion and garlic in a large skillet, add 2 tablespoons red curry paste (or yellow if you prefer milder), and cook for 30 seconds. Add a can of coconut milk, 1 tablespoon fish sauce (or soy sauce), and 1 teaspoon brown sugar.
Add your tenderloins right to the sauce, simmer for 12-15 minutes until cooked through. The sauce reduces and thickens while the chicken cooks. Throw in some snap peas or bell peppers in the last 5 minutes if you’re feeling ambitious.
Serve over jasmine rice with a squeeze of lime and some fresh cilantro if you have it. Total cooking time: 20 minutes. Dishes to wash: one skillet, one rice pot.
8. Bacon-Wrapped Tenderloins (The Special Occasion Ones)
These are what I make when I want to seem fancy but can’t be bothered to actually be fancy. They look impressive, taste incredible, and require exactly three ingredients.
Wrap each tenderloin with a strip of bacon (regular, not thick-cut – it won’t cook in time otherwise). Secure with toothpicks if needed, though I usually just tuck the end under. Season with pepper and a tiny bit of brown sugar.
Bake at 425°F for 20-22 minutes, turning once. The bacon renders its fat, basting the chicken as it cooks. The result? Juicy chicken, crispy bacon, happy people.
Warning: Make extra. My family of four requires at least 12 of these because everyone wants “just one more.”
9. Lemon Pepper Tenderloins (The Light and Fresh Option)
Sometimes you need something that doesn’t involve cream, cheese, or breading. This is that recipe. It’s light, bright, and takes literally 15 minutes.
Season tenderloins generously with lemon pepper seasoning (I use McCormick’s). Heat olive oil in a skillet, cook tenderloins 4 minutes on the first side, 3 on the second. Remove them, add 2 tablespoons butter, juice of one lemon, and 2 tablespoons capers to the pan.
Pour that lemony, buttery goodness over the chicken. Done. Serve with roasted asparagus or a simple salad. It’s the kind of dinner that makes you feel like an adult who has their life together.
10. BBQ Baked Tenderloins (The Lazy Summer Dinner)
When it’s too hot to stand over a stove but you still need to feed people, this is your answer. Toss tenderloins with your favorite BBQ sauce (I’m partial to Sweet Baby Ray’s), arrange on a sheet pan, and bake at 375°F for 18-20 minutes.
That’s it. That’s the recipe.
Okay, fine, here’s my upgrade: In the last 5 minutes, brush with more sauce and broil for 2-3 minutes to get some caramelization. Serve with coleslaw and corn on the cob. Summer dinner: achieved.
11. Chicken Tender Stir-Fry (The Fridge Clean-Out Special)
This is less of a recipe and more of a technique that’ll save you when you have random vegetables threatening to go bad.
Cut tenderloins into bite-sized pieces. Toss with cornstarch, soy sauce, and a little sesame oil. Let them sit while you chop whatever vegetables you have – broccoli, bell peppers, snap peas, carrots, whatever.
Get your wok or largest skillet screaming hot. Cook chicken in batches (don’t crowd the pan!), remove. Stir-fry vegetables in order of cooking time needed. Return chicken, add your sauce (soy sauce, oyster sauce, touch of sugar, garlic, ginger), toss everything together.
The whole process takes maybe 15 minutes, and you’ve just saved yourself from throwing away that slightly sad looking broccoli.
12. Creamy Mushroom Tenderloins (The Date Night Fake-Out)
This tastes like something you’d get at a restaurant, but it’s embarrassingly easy. And yes, I’ve absolutely pretended it was more complicated than it actually is.
Season tenderloins, sear in butter until golden. Remove. In the same pan, sauté sliced mushrooms (baby bellas work great) until browned. Add minced garlic, cook 30 seconds. Pour in 1/2 cup white wine (or chicken broth if you don’t have wine), let it reduce by half.
Add 1/2 cup heavy cream, return chicken to pan, simmer until sauce thickens and chicken is cooked through. Fresh thyme if you have it, dried is fine if you don’t.
Serve over mashed potatoes or pasta. Light some candles. Boom – date night at home for under $15.
13. Nashville Hot Tenderloins (The Spicy Challenge)
Fair warning: These are actually hot. Like, have-milk-ready hot. But if you’re into that (and I am), these are incredible.
The Nashville hot seasoning is what makes these special: 2 tablespoons cayenne, 1 tablespoon paprika, 1 teaspoon garlic powder, 1 teaspoon brown sugar, 1/2 teaspoon each salt and pepper. Mix this with 1/4 cup melted butter.
Bread your tenderloins using the standard flour-egg-breadcrumb method, fry or bake until crispy, then brush with that spicy butter mixture while they’re still hot. The heat hits you immediately, but the brown sugar provides just enough sweetness to keep you coming back.
Serve on white bread with pickles, as is tradition. And seriously, have that milk ready.
14. Pesto Parmesan Tenderloins (The 4-Ingredient Wonder)
Sometimes the best recipes are the simplest. This one requires exactly four ingredients and zero skill.
Brush tenderloins with store-bought pesto (or homemade if you’re feeling ambitious). Sprinkle with grated parmesan. Bake at 400°F for 15-18 minutes. Top with fresh mozzarella in the last 2 minutes if you want to be extra.
That’s it. The pesto keeps the chicken moist, adds tons of flavor, and makes you look like you know what you’re doing in the kitchen. Serve with pasta tossed in more pesto, a simple salad, and call it dinner.
15. Taco-Seasoned Tenderloins (Taco Tuesday Hero)
Forget ground beef – these taco tenderloins have converted my entire family to chicken tacos.
Coat tenderloins in taco seasoning (the packet kind is totally fine, or make your own with chili powder, cumin, paprika, oregano, garlic powder). Bake at 425°F for 15 minutes, or grill for 5-6 minutes per side.
Slice them up, serve in warm tortillas with all the fixings. The tenderloins stay juicier than chicken breast, and they’re easier to eat in a taco than bigger pieces of chicken.
Pro move: Make double and use the leftovers for chicken taco bowls for lunch the next day.

Pro Tips That’ll Change Your Tenderloin Game
The Brine Solution Nobody Talks About
I know, I know – brining sounds like something only food nerds do. But hear me out: 20 minutes in salt water will transform your tenderloins. Just dissolve 2 tablespoons salt in 2 cups warm water, submerge your tenderloins, and go scroll through your phone. Rinse, pat dry, and cook as usual. They’ll be noticeably juicier.
The Two-Temperature Method
Here’s something I learned from America’s Test Kitchen that blew my mind: Start your tenderloins in a cold pan with oil, then turn on the heat. They cook more evenly and you’re less likely to overcook the outside before the inside is done. This works especially well for thicker tenderloins.
The Resting Rule
I used to skip resting because tenderloins are small and I’m impatient. Mistake. Even 3-5 minutes of resting makes a difference. Cover them loosely with foil and just leave them alone. Use that time to finish your sides or pour yourself a glass of wine. You’ve earned it.
The Marinating Sweet Spot
Tenderloins are thin enough that they don’t need overnight marinating. In fact, acidic marinades can make them mushy if left too long. The sweet spot? 30 minutes to 2 hours, max. Any less and you won’t taste it, any more and the texture gets weird.
Common Mistakes and How to Fix Them
“My Tenderloins Are Always Dry”
You’re overcooking them. I guarantee it. Get a meat thermometer (seriously, it’s like $10 and will change your cooking life). Pull them at 160°F and let carryover cooking take them to 165°F. Also, see my note about brining above.
“The Breading Falls Off”
This drove me crazy until I figured out the problem: wet chicken. Pat them completely dry, then let the breaded tenderloins rest for 5 minutes before cooking. The coating needs time to adhere. Also, don’t flip them too early – wait until the first side is truly golden.
“They Cook Unevenly”
If some parts are done while others are still pink, your tenderloins are probably different sizes. Either pound them lightly to even thickness, or remove the thinner ones from heat earlier. Also, check your pan placement – if one side of your oven runs hot, rotate the pan halfway through.
“They Stick to the Pan”
Two issues here: your pan isn’t hot enough, or you’re trying to flip too soon. The chicken will release naturally when it’s ready to flip. If you’re forcing it, wait another minute. Also, don’t move them around while they’re cooking – let them sit and develop that crust.
Storage, Reheating, and Meal Prep Magic
Storing Cooked Tenderloins
Cooked tenderloins keep for 3-4 days in the fridge, which makes them perfect for meal prep. Let them cool completely before storing (I learned this the hard way – warm chicken in a closed container creates condensation, which makes everything soggy).
Store them in a single layer if possible, or with parchment between layers. This prevents them from sticking together and makes it easier to grab just what you need.
The Right Way to Reheat
Microwave is the enemy of crispy coatings, but sometimes it’s all we have. If you must microwave, do it at 50% power in 30-second intervals. Better option: toaster oven at 350°F for 5-7 minutes. Best option: air fryer at 375°F for 3-4 minutes. They’ll actually re-crisp!
For sauced tenderloins, add a splash of water or broth before reheating to prevent them from drying out. Cover with a damp paper towel if microwaving.
Meal Prep Strategy
Sunday prep has saved my weeknight sanity. I’ll cook 3 pounds of tenderloins with just basic seasoning, then use them throughout the week:
- Monday: Slice over Caesar salad
- Tuesday: Reheat with buffalo sauce
- Wednesday: Chop for chicken tacos
- Thursday: Add to pasta with store-bought alfredo
The key is cooking them slightly under (pull at 160°F) since they’ll cook a bit more when reheated.
Nutritional Breakdown and Health Benefits
Let’s talk numbers, because tenderloins are actually a nutritional powerhouse. According to the USDA nutritional database, a 4-ounce serving of cooked chicken tenderloin contains:
- Calories: 140
- Protein: 26g
- Fat: 3g
- Carbs: 0g
- Iron: 1mg
- B vitamins: Excellent source
They’re naturally lean, with less fat than thighs but more moisture than breast meat. It’s the goldilocks of chicken cuts. And that protein content? Perfect for muscle recovery if you’re working out, or keeping kids full until actual bedtime instead of asking for snacks 45 minutes after dinner.
The best part is they’re a blank canvas nutritionally. Grill them with just herbs and lemon? Super lean and healthy. Bread and fry them? Still better than fast-food nuggets because you control the oil and ingredients.
Serving Suggestions That Actually Make Sense
Quick Weeknight Pairings
- With pasta: Slice and toss with any pasta and jarred sauce. Instant protein upgrade.
- Over rice: Any of the sauced versions work brilliantly over rice – it soaks up all the flavor.
- In wraps: Slice them up, add some veggies and sauce, roll in a tortilla. Lunch sorted.
- Salad toppers: Especially good with the lemon pepper or grilled versions.
Company-Worthy Combinations
- Bacon-wrapped tenderloins + garlic mashed potatoes + roasted Brussels sprouts
- Mediterranean tenderloins + orzo salad + Greek salad
- Creamy mushroom tenderloins + wild rice + roasted asparagus
- Parmesan crusted + caesar salad + garlic bread
Kid-Friendly Sides That Adults Like Too
- Sweet potato fries (bake alongside the tenderloins)
- Mac and cheese (because obviously)
- Corn on the cob
- Cucumber slices with ranch
- Apple slices (sounds weird, works great with honey garlic tenderloins)
FAQs About Chicken Tenderloins
Can I substitute chicken breasts for tenderloins in these recipes?
You can, but you’ll need to adjust cooking times and probably pound the breasts thin. Honestly, just buy tenderloins – they’re usually only about $0.50 more per pound and will save you the hassle.
How do I know when tenderloins are fully cooked without a thermometer?
While I strongly recommend getting a thermometer, here’s the test: they should be firm to the touch (not squishy), and when you cut into the thickest part, the juices should run clear with no pink. But seriously, get a thermometer.
Can I cook frozen tenderloins directly?
Yes! Add about 50% more cooking time and use lower heat to ensure they cook through evenly. For breaded ones, I’d thaw first though – the coating adheres better to thawed meat.
Why are my tenderloins tough and chewy?
Overcooking is usually the culprit. Tenderloins go from perfect to overcooked really quickly because they’re thin. Also, if you bought “tenderloin pieces” instead of whole tenderloins, those tend to be tougher cuts.
What’s the white foam that appears when I cook tenderloins?
That’s just protein coagulating – totally normal and safe. You can skim it off if it bothers you, but it’s harmless. It happens more with wet cooking methods or if the chicken wasn’t patted dry first.
Conclusion
Look, I get it. Another night, another dinner to figure out. But chicken tenderloins have honestly made my life easier, and I’m not just saying that. They cook fast enough that I can start dinner at 6:00 and have everyone fed by 6:30. They’re versatile enough that my family hasn’t gotten bored even though we eat them at least twice a week. And they’re forgiving enough that even on nights when I’m distracted by homework help or work emails, dinner still turns out edible.
The recipes I’ve shared here aren’t fancy chef creations – they’re real recipes that work in real kitchens with real schedules (and real budgets). Start with one or two that sound good, master those, then branch out. Before you know it, you’ll be improvising your own versions based on whatever’s in your fridge.
And hey, if all else fails, there’s no shame in basic breaded tenderloins with ketchup. We’ve all been there, and honestly? Sometimes that’s exactly what everyone needs. The important thing is getting dinner on the table and everyone fed. These little strips of chicken make that just a little bit easier, and in my book, that’s worth its weight in gold. Or at least in perfectly cooked, juicy chicken tenderloins.
So grab a package next time you’re at the store. Your future stressed-out, trying-to-make-dinner self will thank you. Mine certainly does, every single Tuesday (and Thursday, and sometimes Saturday).