The Ultimate Beef Bone Broth Recipe: 24-Hour Method for Rich, Nourishing Liquid Gold
The first time I made recipe bone broth from scratch, I honestly thought I’d ruined it. After about six hours of simmering, my kitchen smelled like a French bistro, but the broth looked… well, pretty unimpressive. Just brownish water with some sad vegetables floating around. But here’s the thing – I kept going, and by hour 18, that pot of “brown water” had transformed into the most incredible, rich, gelatinous liquid gold I’d ever tasted. My kids actually asked for seconds of what was essentially recipe tea!
If you’re looking for a nourishing, flavorful, and versatile addition to your kitchen, a beef bone broth recipe is the perfect choice. And trust me, once you experience the difference between homemade and store-bought, you’ll never go back. There’s something deeply satisfying about turning what most people throw away into something so incredibly nutritious and delicious. Plus, your house will smell amazing for an entire day – consider it free aromatherapy!
Packed with rich umami flavor and brimming with nutrients like collagen, amino acids, and minerals, recipe bone broth has been cherished for centuries as both a comfort food and a natural health booster. My grandmother used to say that bone broth could cure anything from a cold to a broken heart, and while I can’t verify the broken heart part, I definitely feel better after sipping a warm mug of this stuff. Whether you enjoy it as a warm, soothing drink on a cold day, use it as a base for soups and stews, or incorporate it into sauces and gravies, homemade bone broth delivers both taste and wellness benefits that store-bought versions simply can’t match.
Why Your Bones Matter: Choosing the Right Foundation
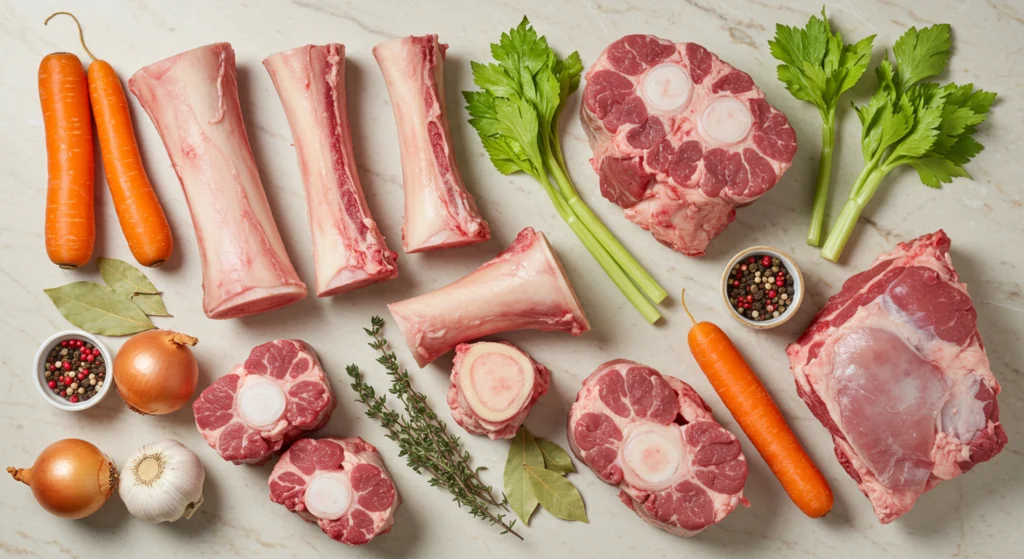
So here’s what nobody tells you about making recipe bone broth – not all bones are created equal. I learned this the hard way after my first attempt using only marrow bones resulted in a fatty, one-note broth that honestly wasn’t that great. The secret? You need a mix of bones to get that perfect balance of flavor and gelatin.
For the ultimate recipe bone broth recipe, I always grab a combination of:
- Knuckle bones (these are your gelatin powerhouses)
- Marrow bones (hello, rich flavor!)
- Meaty bones like oxtail or short ribs (because we want taste, not just nutrition)
- Neck bones if you can find them (total game-changer for body and flavor)
I typically use about 4-5 pounds (roughly 2-2.5 kg) of bones for a big batch. And yes, you absolutely want to ask your butcher to cut the larger bones in half – they’ll usually do it for free, and it makes such a difference in extraction. Don’t be shy about asking; I’ve found that butchers actually love when customers want bones for broth. One of mine even saves the good knuckle bones for regular broth-makers like me!
The quality of your bones matters too. If possible, go for grass-fed recipe bones. According to research on grass-fed beef nutrition, these bones contain higher levels of omega-3 fatty acids and conjugated linoleic acid (CLA). But honestly? If conventional is what’s in your budget, that’s perfectly fine. The most important thing is that you’re making it yourself.
The Roasting Secret That Changes Everything
Okay, can we talk about roasting for a second? Because this step is absolutely crucial, and I see so many people skip it. Raw bones will give you a pale, bland broth – we’re talking hospital food vibes. But roasted bones? That’s where the magic happens.
Here’s my foolproof roasting method:
- Preheat your oven to 450°F (230°C)
- Spread bones in a single layer on a rimmed baking sheet
- Roast for 30 minutes, flip them over (yes, this matters!)
- Add rough-chopped onions, carrots, and celery to the pan
- Roast another 30-45 minutes until everything’s deeply browned
You want those bones looking seriously caramelized – we’re talking deep brown, not just tan. Sometimes I’ll even let them go a bit longer if they’re not quite there. That browning is pure flavor development, and it’s what separates restaurant-quality broth from the amateur stuff.
Quick tip I learned from a chef friend: save the rendered fat from the roasting pan. It’s basically recipe gold, perfect for roasting potatoes or starting your next batch of French onion soup. Just scrape it into a jar and keep it in the fridge.
The Long, Slow Journey to Liquid Gold
Now comes the part that requires patience – and I mean real patience. We’re talking 24-48 hours of simmering here. I know, I know, that sounds insane. But this is where the transformation happens. This is where tough collagen breaks down into silky gelatin, where minerals leach from the bones, where magic basically happens in your stockpot.
Here’s my process that’s never failed me:
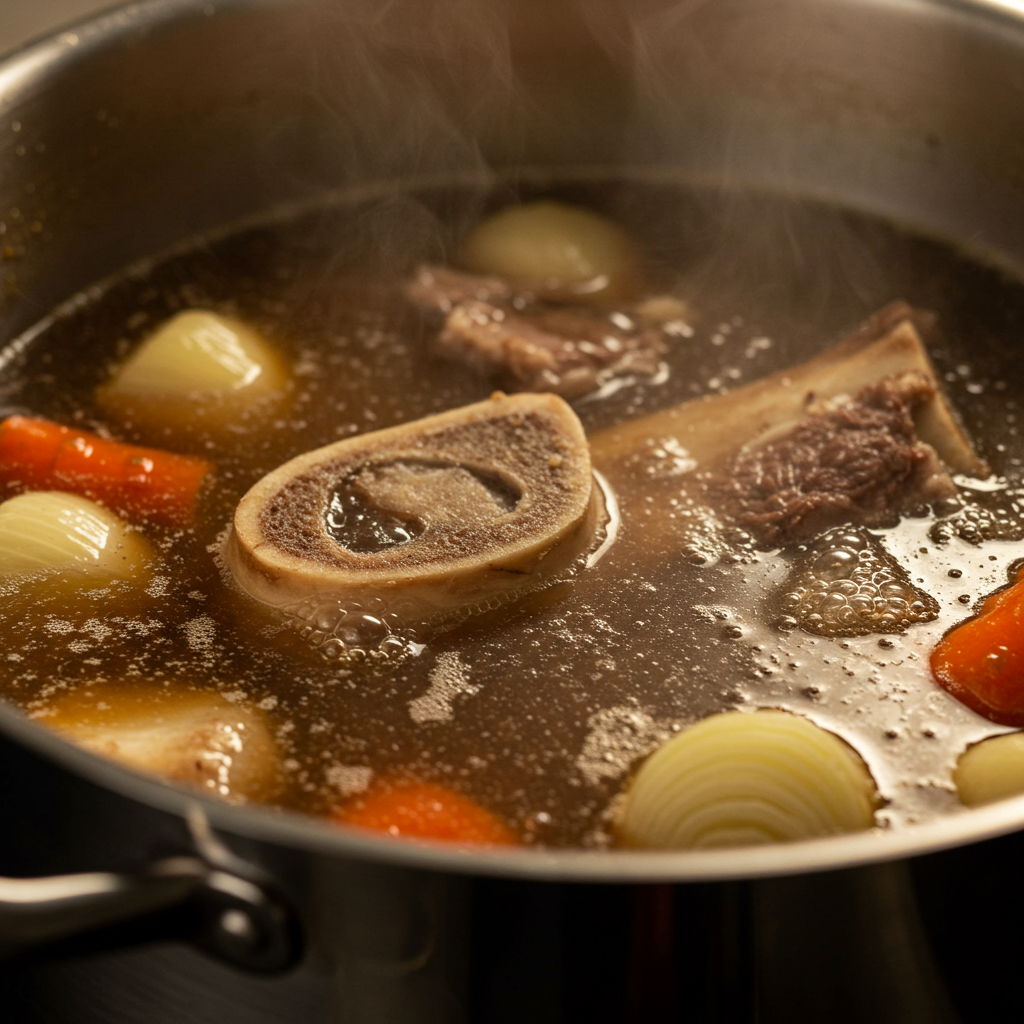
Add your roasted bones and vegetables to your largest pot (seriously, go big – I use a 12-quart stockpot). Cover with cold water by about 2 inches. This usually takes about 12-14 cups (3-3.5 liters) of water. And here’s a weird but important tip: add 2 tablespoons of apple cider vinegar and let it sit for 30 minutes before heating. The acid helps extract minerals from the bones – you won’t taste it in the final product, I promise.
Bring it to a gentle simmer – and I mean gentle. We’re talking barely bubbling, lazy bubbles kind of simmer. This should take about an hour on medium-low heat. You’ll see some gross-looking foam rise to the top. Skim that off with a ladle or large spoon. It’s just impurities and proteins coagulating, totally normal but you don’t want it in your final broth.
The Art of Low and Slow Simmering
Here’s where most people mess up their beef bone broth – they boil it. A rolling boil will give you cloudy, greasy broth that tastes kind of harsh. Trust me, I’ve been there. You want the laziest simmer possible, just a few bubbles breaking the surface here and there.
For the first 24 hours, I just let it do its thing, checking every few hours to make sure the water level is good. You’ll need to add water occasionally as it evaporates – I usually add about 2 cups every 6-8 hours. Some people stress about diluting the broth, but honestly, it’s better than letting your bones get exposed and dry out.
After 24 hours, taste it. It should be good, but not mind-blowing yet. If you can swing it, keep going. Hours 24-48 are where the real depth develops. The broth gets richer, more complex, almost wine-like in its depth. My record is 72 hours (during a blizzard when I couldn’t leave the house anyway), and that batch was absolutely transcendent.
Oh, and about leaving it overnight – yes, I do it. Some people freak out about safety, but professional kitchens do this all the time. If you’re nervous, you can transfer it to a slow cooker on low, or just refrigerate it overnight and continue the next day. The USDA’s guidelines on safe soup making suggest maintaining a consistent temperature above 140°F (60°C) for safety.
Vegetables and Aromatics: The Supporting Cast
While bones are the star, your vegetables and aromatics are crucial supporting players. After years of tweaking, here’s my go-to lineup:
- 2 large onions, quartered (leave the skin on for color!)
- 4 large carrots, chunked (no need to peel)
- 4 celery stalks with leaves (the leaves add great flavor)
- 1 whole head of garlic, cut in half horizontally
- 2 bay leaves
- Small bunch of fresh thyme
- 1 tablespoon whole black peppercorns
- Small handful of fresh parsley stems (save the leaves for garnish)
And here’s my secret weapon: a 2-inch piece of fresh ginger and a whole star anise. Not traditional, I know, but they add this subtle warmth and complexity that people can never quite identify. “What makes your broth taste so… interesting?” they ask. That’s what.
I add the hardy vegetables (onions, carrots, celery) during roasting, then everything else goes in the pot. The fresh herbs go in during the last 2-3 hours – any longer and they start tasting bitter and medicinal.
Straining and Storing: Don’t Waste Your Hard Work
After all that time and effort, proper straining and storage is crucial. First, turn off the heat and let it cool for about an hour. Trying to strain boiling hot broth is dangerous and messy – ask me how I know.
I use a two-step straining process:
- First pass through a regular colander to catch the big stuff
- Second pass through a fine-mesh strainer or cheesecloth for clarity
Some people go crazy with coffee filters for crystal-clear broth, but honestly, a little cloudiness doesn’t bother me. This is rustic, homemade food, not molecular gastronomy.
For storage, I’ve learned some hard lessons. Always cool your broth completely before refrigerating – putting hot broth straight in the fridge can raise the temp and spoil other foods. I use an ice bath: fill your sink with ice water and set the pot in it, stirring occasionally. Gets it cold in about an hour.
Once cold, you’ll see a layer of fat solidify on top. You can remove it if you want, but I usually leave some – fat is flavor, and it actually helps preserve the broth. Plus, spreading that beef fat on toast with a sprinkle of sea salt? Don’t knock it till you’ve tried it.
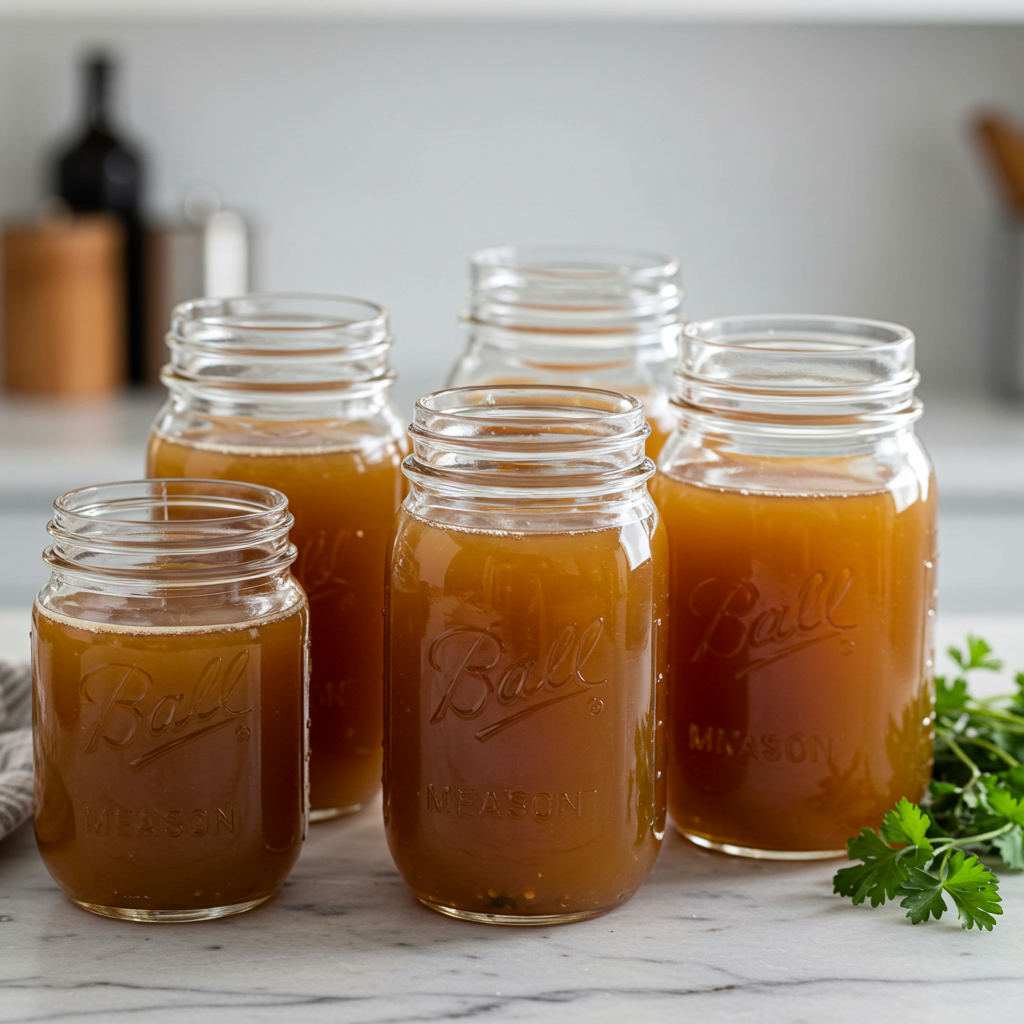
Storage timeline:
- Fridge: 5 days in airtight containers
- Freezer: 6 months (I use ice cube trays for portion control)
- Pressure canned: 1 year (if you’re into canning)
Pro Tips from My Kitchen
After making beef bone broth probably a hundred times, here are my non-negotiable tips:
• Season at the end, not the beginning – as the broth reduces, salt concentrates. I’ve ruined batches by salting too early
• Save your vegetable scraps throughout the week in a freezer bag – carrot ends, celery leaves, onion skins all work great
• A splash of fish sauce in the last hour adds incredible umami without any fishy taste
• Make bone broth ice cubes – freeze in ice cube trays, then transfer to bags. Perfect for deglazing pans or adding to gravies
• The ‘jiggle test’ – properly made broth will jiggle like jello when cold. No jiggle? You need more collagen-rich bones next time
• Don’t fear the funk – around hour 12, your house might smell a bit… intense. That’s normal. Open a window, light a candle, embrace it
• Instant Pot method works in a pinch (2 hours on high pressure), but it’s not quite the same depth of flavor
• Save the meat from meaty bones – shred it and use for tacos, sandwiches, or pet food (dogs go crazy for it)
Creative Ways to Use Your Liquid Gold
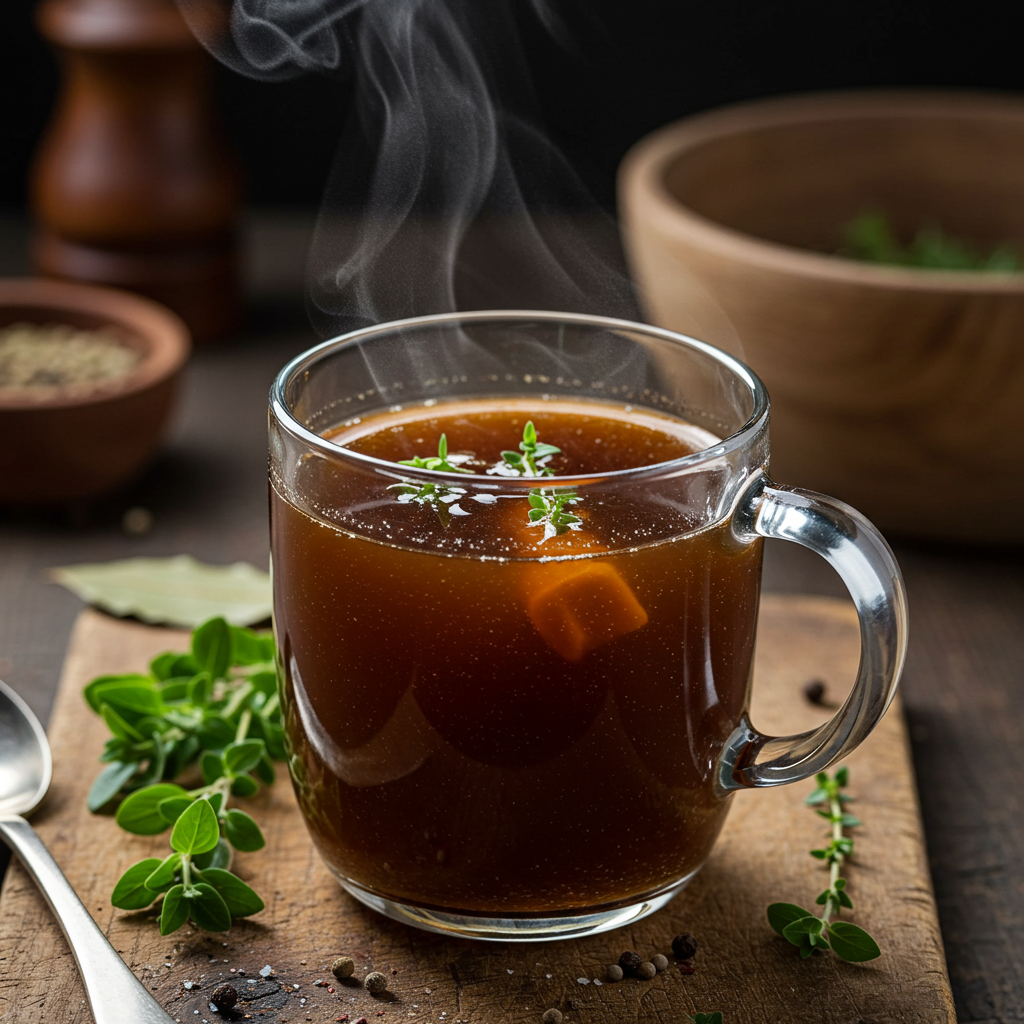
So you’ve made this incredible beef bone broth – now what? Sure, you can sip it straight (and you should – with a pinch of sea salt and maybe a squeeze of lemon), but there’s so much more you can do.
My family’s favorites:
- French onion soup that’ll rival any bistro’s
- Pho broth – just add star anise, cinnamon, and cloves
- Risotto made with bone broth instead of regular stock (total game-changer)
- Braising liquid for pot roast or short ribs
- Cooking liquid for grains – quinoa cooked in bone broth is incredible
- Base for gravies and pan sauces that’ll make you look like a pro
I even use it in my favorite egg drop soup recipe – just heat a cup of broth, whisk in a beaten egg, add some scallions and a drop of sesame oil. Better than coffee for starting your day, especially in winter.
My trainer actually recommended drinking a warm cup before workouts for the amino acids and electrolytes. Whether that’s bro science or real science, I don’t know, but I feel great doing it.
Troubleshooting Common Bone Broth Problems
Let’s be real – not every batch turns out perfect. Here’s how to fix common issues:
Broth won’t gel? You need more collagen-rich bones (knuckles, feet, joints) or longer cooking time. Also check your ratio – too much water dilutes the gelatin.
Tastes bland? You probably didn’t roast the bones dark enough, or you need more meat on those bones. A tablespoon of tomato paste added during roasting helps too.
Cloudy broth? You boiled it too hard. Next time, keep it at the laziest simmer possible. You can clarify cloudy broth with egg whites if you’re fancy, but I never bother.
Greasy film? That’s normal! Just refrigerate and remove the solid fat layer. Save it for cooking – it’s basically free cooking fat.
Bitter taste? You might have scorched the vegetables during roasting, or added herbs too early. Fresh herbs should only simmer for 2-3 hours max.
The Bottom Line on Bone Broth
Making beef bone broth at home is one of those old-school kitchen skills that’s absolutely worth learning. Yes, it takes time – like, a ridiculous amount of time. But most of that is passive, just letting it bubble away while you live your life. The actual hands-on time is maybe 30 minutes total.
What you get in return is liquid gold that would cost you $12-15 per quart at those fancy bone broth bars (yes, those are a thing now). More importantly, you get complete control over the quality and flavor, plus the satisfaction of turning “waste” into something nourishing and delicious.
My advice? Start your first batch on a Friday night, let it go through the weekend, and strain it Sunday evening. Your house will smell amazing, you’ll have broth for weeks, and you’ll feel like a kitchen wizard. Once you taste the difference between homemade beef bone broth and the boxed stuff, there’s no going back.
So grab some bones from your butcher (seriously, they’re usually super cheap or even free), clear your schedule for the weekend, and get ready to make something truly special. Your soups, stews, and sauces will never be the same – and neither will your appreciation for this ancient cooking tradition.
Have you tried making bone broth at home? I’d love to hear about your experiences, especially any unique ingredients or techniques you use. Drop a comment below and let’s keep this conversation simmering!